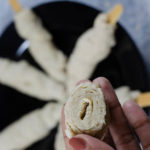
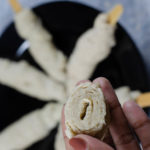
What is soya chaap made of ?
Soya chaap, Its unique texture and mouthfeel has made it the most popular mock meat in India esp. in the northern states. In Delhi, chaap is eaten on meat free holy days and religious festivals. There are a lot of street vendors, selling 100s of varieties of chaap tikka and rolls.
To watch this recipe in detail –
But its manufacturing process and ingredients have remained a mystery so far, because it is mainly a commercially manufactured product by small dairies or factory like setups. I have developed This recipe of chaap based on Seitan (mock meat) recipes.
I have also used the ingredients list on soya chaap tin as a guide to make this chaap as close to store brought one as possible. Seitan is quite a popular meat substitute in the vegan world. It is made using wheat gluten. Gluten is the protein present in wheat flour, which when kneaded properly forms strands and has a springy texture very similar to meat. It is said to have been invented by Chinese Buddhist monks, who practiced vegetarianism long before it was a fad.
The name SOYA chaap is actually misleading, because it doesn’t contain a lot of soya in truth. The ratio of soya flour to gluten is very less. But IT IS a healthy and high protein meat substitute , if you don’t have gluten intolerance. In my recipe I have used soya flour also. I have found that adding soya flour balances out the firm chewiness of the gluten and makes it more bitable, juicy and soft without being too rubbery. Without the soya flour the chaap tasted very very chewy and the mouthfeel was almost like a sponge.

Soya Chaap
There are a lot of recipes available online which use soaked soya beans or soya nuggets , I have tried many such recipes but the results were very unsatisfactory and nothing like store brought soya chaap. After a few disappointments I have developed this recipe which is fail proof and makes Raw Soya Chaap sticks with the perfect stringy and open texture and a soft easy bite. It absorbs the flavours from the marinade very easily and remains juicy even after roasting. This soya chaap stick is perfect to use in recipes as a starter or you can even make a delicious gravy based sabzi with it. Sorry for tooting my own horn , but its true !! 🙂
I have shared two ways of making authentic raw soya chaap sticks, using maida/ all purpose flour and by using vital wheat gluten. Both give similar results, but obviously the gluten method is easier, less time consuming and cheap.
Enjoy these chaaps in whatever way you want, whether in grilled tikka form or make a gravy based sabzi with it. You can make soya chaap makhani using the gravy from my paneer butter masala recipe.
You can also try my stuffed Mango Kulfi recipe, inspired by Delhi’s Kuremal Kulfi which is another classic !!
To learn how to make Delicious EGGFREE Brownies, Home Baked Bread , and more from me, check out details of my online courses in the following the link :- Click Here
Print
SOYA CHAAP STICK RECIPE – KNEADING METHOD
- Prep Time: 1.5 hours
- Cook Time: 20 mins
- Total Time: 2 hours
- Yield: 4-5 chaap 1x
Description
With this recipe , you can make soya chaap just like store bought or tinned chaap by using dough maker machine or kneading by hand.
Ingredients
FOR THE GLUTEN
All purpose flour 500 grams
Water 320 ml
FOR THE CHAAP
Soya bean flour – 8 tablespoon
All purpose flour – 3 tbsp
Water – 5-6 tablespoon
Salt to taste
FOR THE BROTH
Water 2–3 cups
Sugar 1 teaspoon
Salt 3 teaspoon
Vinegar 1 teaspoon
Flavouring agents like Maggi stock cube , Ajinomoto , vegetable stock ,etc
Instructions
- In a dough maker / stand mixer make a dough with water and all purpose flour. knead for 10 – 15 minutes in the machine. If you are going to knead by hand then knead for 20-25 minutes.
- Knead until the dough is stretchy and elastic. Remove it in a clean bowl cover with a moist cloth and rest for 45 minutes to 1 hour.
- This resting period allows the gluten to form properly and relax and also lets the dough hydrate properly.
- Now wash this dough under running water . Gently massage it till the water becomes milky.
- This milky water is nothing but starch that is released from the dough. Starch is soluble in water and easily separated from the dough.
- After washing the dough for 3-4 times more the water will begin to run clear. This means that all the starch has been discarded and now you are left with pure gluten.
- From 500 grams of dry flour you can get around 150 to 200 grams of gluten.
- Now add in the soybean flour , all purpose flour , salt and 5 – 6 tablespoons of water. knead this properly till all of the ingredients are well Incorporated. You may find it difficult to knead it and it will take some time but keep at it.
- In about 10 to 12 minutes this dough for the chaap will come together. It should be very elastic and loose at this stage. If you feel that it is too tight or tough try to loosen it with some more water . No dry all purpose flour or soybean flour should remain.
- To check if it is done till correct consistency, hold a small piece of this dough in your hand. It should naturally start stretching downwards easily.
- This correct consistency of the dough is very important to make juicy and soft chaap. If the dough is too tight and tough then the chaap will become very chewy and rubbery.
- Let the dough relax for 15-20 minutes (covered) till it is very very loose and Elastic. Divide it into equal balls of 40 to 45 grams each and then wrap it around an ice cream stick. You can watch the video to see the technique clearly.
- To cook the Chaap heat water till it comes to a rolling boil. Add salt , sugar and vinegar.
- You can also add flavouring agents like Ginger , Garlic or any masala if you know what you are going to make from the chaap. Flavouring agents are not added in commercial chaap. You can also add MSG / ajinomoto to bring out the meaty umami flavour in the Chaap.
- Add the chaap into the boiling water and simmer for 15 to 20 minutes ( or till they float on top) without covering the pan. Do not boil the Chaap at high flame. Do not cover the pan with a lid to avoid strong smell of gluten.
- Transfer the cooked Chaap into cold water to immediately stop the cooking process.
- You can use them right away or freeze them for later use.
Notes
- Kneading the dough for 15-20 minutes is extremely important to develop the gluten in it. If the gluten is properly developed then you will get more gluten per kg of dry flour. If you have not kneaded the dough well your yield of gluten per kg of dry flour will be very less.
- After adding soya flour to the gluten, you may find it difficult to knead and form a homogenous dough, but don’t reduce the quantity of soya flour or water. I have noticed that adding more soya flour results in softer and juicier soya chaap. If soya flour is reduced or the gluten dough is very tough (less water or not relaxed properly ) then the chaap will become spongy and chewy.
- To freeze the chaap lay them on a tray and put it in the freezer. Freeze the chaap for four to five hours until they become hard. Then transfer them into a ziplock bag and freeze again. You can use it for up to 3 months.
- I have found that the texture of this soya chaap is much better after defrosting.
Keywords: Soya Chaap

SOYA CHAAP STICK RECIPE – AUTOLYSE METHOD
- Prep Time: 12 hours
- Cook Time: 20 mins
- Total Time: 12 hours
- Yield: 4-5 chaap 1x
Description
With this recipe , you can make soya chaap just like store bought or tinned chaap without kneading or using dough maker machine . We will be using the process of “Autolysing”.
Ingredients
FOR THE GLUTEN
All purpose flour 500 grams
Water 420 ml
FOR THE CHAAP
Soya bean flour – 8 tablespoon
All purpose flour – 3 tbsp
Water – 5-6 tablespoon
Salt to taste
FOR THE BROTH
Water 2–3 cups
Sugar 1 teaspoon
Salt 3 teaspoon
Vinegar 1 teaspoon
Flavouring agents like Maggi stock cube ,ajinomoto, vegetable stock ,etc
Instructions
- Mix together the dough and water, till it comes together. No need to knead this dough. Slightly more water is required in this recipe than kneading method.
- Transfer to a clean bowl and Cover it properly with the help of a clingfilm. Stick the cling film to the surface of the dough so that the top layer of the dough doesnt become hard or dry.
- Leave this dough at room temperature for 1-2 hours. You will see that the dough will get smoother and well formed after 2 hours. Here water and dough are going through the process of autolysis. Then transfer it to the refrigerator for 10-12 hours.
- Because of autolysis , kneading is not required. Gluten is developed because of natural enzyme activity over a long period of time. So this method is easy and does not require a lot of effort.
- After 10-12 hours your dough is ready , with well developed gluten.
- Now wash this dough under running water to separate the gluten and starch.
- You can follow the same instructions as the kneading method recipe from this point forward.
Notes
Same as the previous recipe.
Keywords: Soya Chaap

SOYA CHAAP STICK RECIPE – USING VITAL WHEAT GLUTEN
Description
You can easily make chaap by using vital wheat gluten that is readily available using this recipe. It is quick and simple.
Ingredients
Vital Wheat Gluten – 120 gms
Soya flour – 80 gms
All Purpose Flour – 30 gms
Water – 320 gms
Salt to taste
Use same ingredients for broth as previous recipes
Instructions
- Mix all the ingredients in a dough maker / stand mixer machine. knead on medium for 12 – 15 mins. Till the dough becomes very elastic and stretchy.
- If you are kneading by hand you will require to knead for 20-25 mins. Initially it will be a little difficult to knead this dough, but continue kneading till it comes together. Use the stretch and fold method of kneading to develop elongated strands of gluten.
- Then cover and rest the dough for 45 mins – 1 hour.
- The gluten should be relaxed completely and the dough should become very loose and floppy.
- Divide this in balls of 45-50 gms and wrap around icecream sticks as shown in the video.
- Proceed to cook the chaap in the same way as the previous recipe.


This is a fantastic recipe! You can see the effort that went into troubleshooting and figuring out the best combination and conditions. Just made this today and it is exactly like the fresh chaap in Delhi!
Yay, Im so glad you tried the recipe and got satisfying results !
Hi Hasti, In the web page you mentioned 3 table spoon all purpose flour to be added in approx 150-200 grm gluten and 8 table spoon soya flour.
Question:
1. In your video you did not add all purpose flour
2. Is soybean flour made from pulses (daal) or soya chunks nutella
Thank you
yes, i have not shown it in the video. but the written recipe is the corrected and updated version. soya flour is the flour of soya bean pulse not powdered nutrella.
Can we use wheat flour instead of APF
wheat flour has bran or fibre, which doesnt allow proper gluten formation which is important for good chaap.
I am making soya chaap but layers is not developed in soya chaap, i am using your vital gluten method, please suggest me i have no dough maker
You can try the following , firstly let the dough rest overnight in the fridge. It will become very loose and stretchy. then divide it into small portions and let it become loose and floppy again. Then roll it on the candy stick. keep pulling it thinly as you roll , the more turns you get in while rolling the more layers your chaap will have. the trick to get more layers is proper rolling technique.
Thanks , please suggest me boiling process,i mean how much time
Madam, my chaaps is become hard. What can i do
Are you adding maida and soya flour to the gluten mix ? they could also become hard if they are not rested properly or overboiled.
The time varies depending on the type of vessel you use and how much water is there. But boiling the chaap for 20-25 mins is ideal/.
Thanks For Sharing this Amazing Recipe. My Family Loved It. I will be sharing this Recipe with my Friends. Hope They will like it.
Thanks so much ! You can connect with me on instagram and tag your soyachaap photos with #chefhasti so that I get notified !!